Support
How can we help?
Search our Support page to find information relating to your query or go directly to the relevant articles for your website by clicking on one of the 4 boxes below.
Support - Impact
Support - Serenity
Support - Clarity
Support - Limelight
Popular questions
Editing my Webbie Site
Updating my account details
Using my email account
Maintaining site performance
Updating your logo
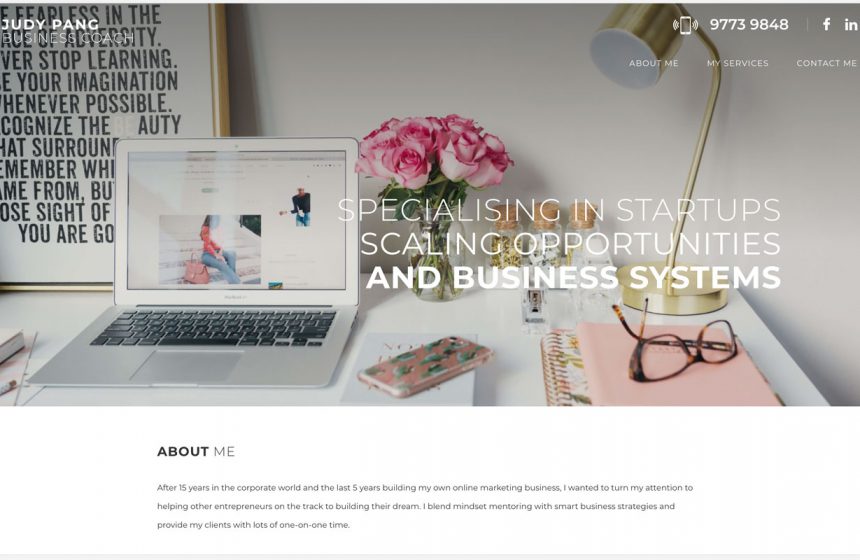
Serenity Website Guides

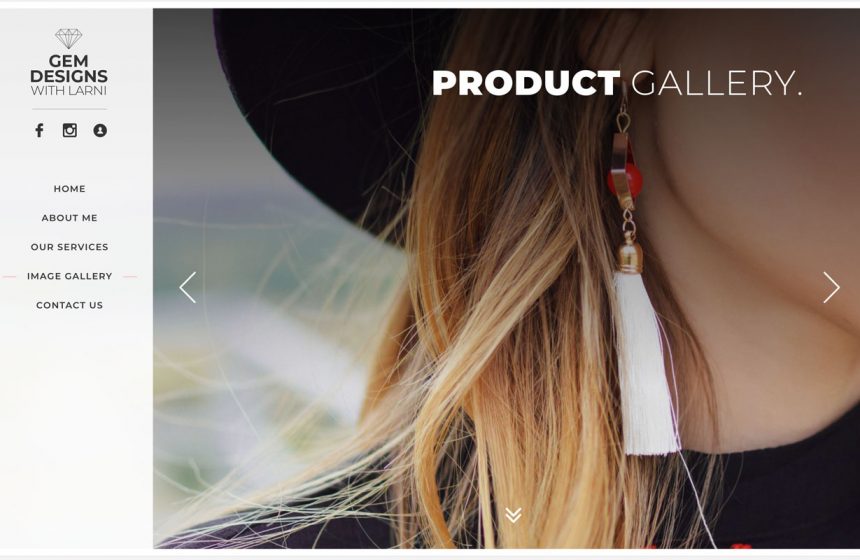
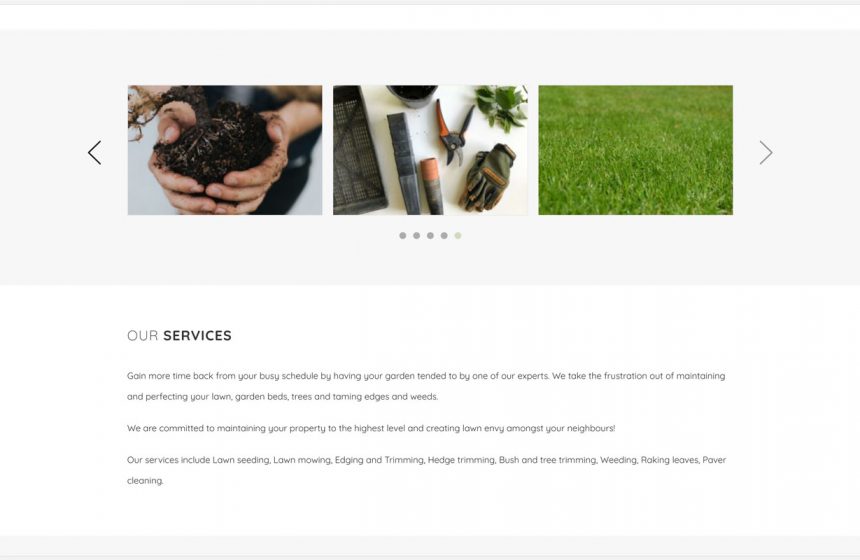
Home page image slider
- Login to your website (we sent you login details when your site went live).
- Click on ‘Pages’ from the left hand menu.
- Click on ‘Home’ page.
- Click on the ‘Slides’ tab. The Home page image slider is in the first box called ‘Slider’.
- To remove an image, hover over the image and click on the red cross.
- To add an image from your Media library, click on ‘Add to gallery’ button and select the image and click on the ‘Select’ button.
- To add a new image, click on ‘Add to gallery’ button and drag/upload your new image to the Media Library. Complete the Title and Alt Text fields and click on ‘Select’.
- If you want to change the order in which the images appear on your slider, click directly on the image to select the image and drag it to another position.
- Once you’ve finished making the updates you wanted, click on the ‘Update’ button to publish it to your live site.
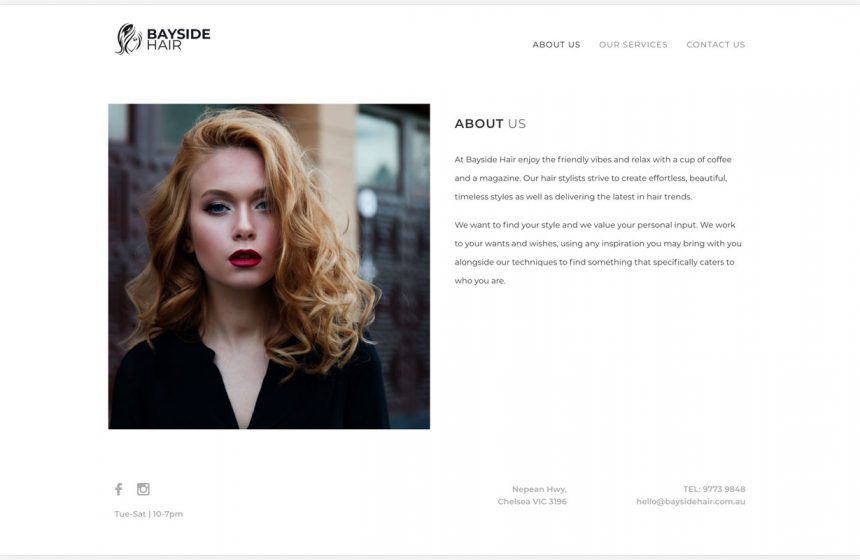
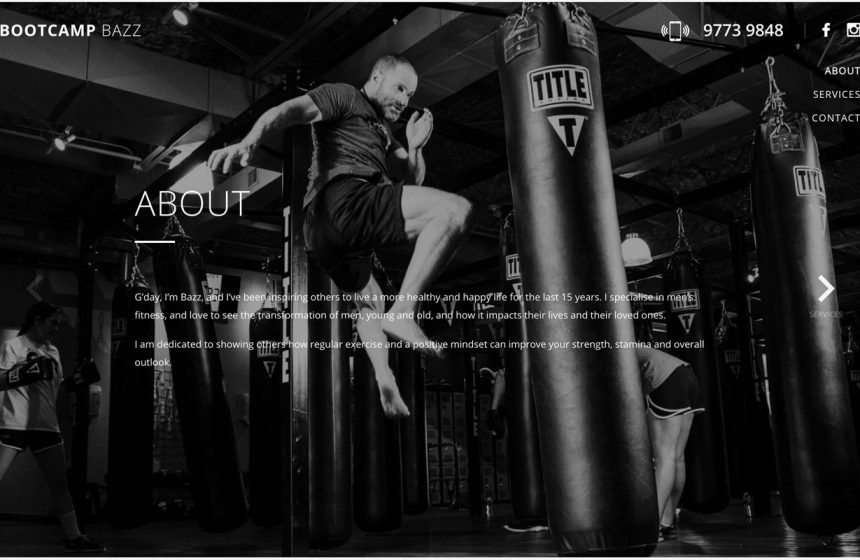
About page copy
- Login to your website (we sent you login details when your site went live).
- Click on ‘Pages’ from the left hand menu.
- Click on the ‘Home’ page.
- Click on the ‘Slides’ tab. Here you will find the text for your main pages in all the boxes labelled ‘Text’.
- Scroll down to ‘Content About’ and to the ‘Text’ area. Click in the Text box to edit your copy. Keep in mind that the maximum number of words for this area shouldn’t exceed 140 words.
- Once you’ve finished making the updates you wanted, click on the blue ‘Update’ button (top right of you window) to publish it to your live site.
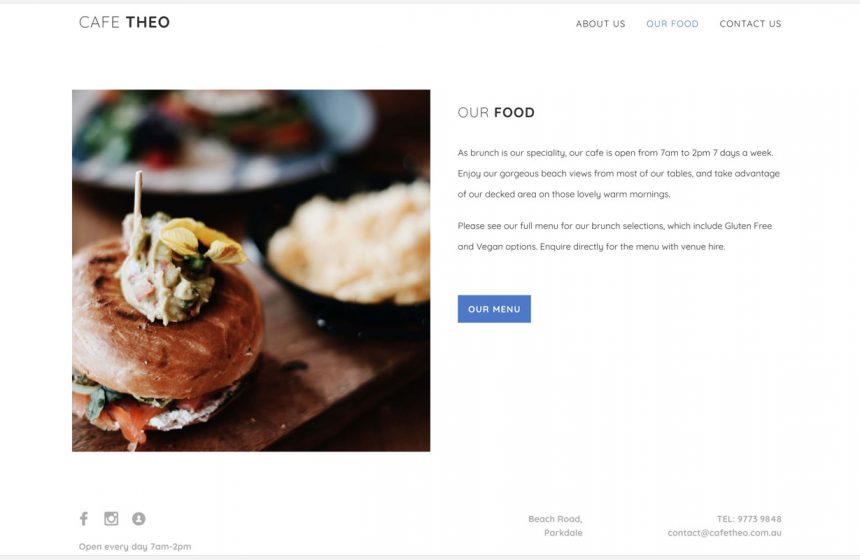
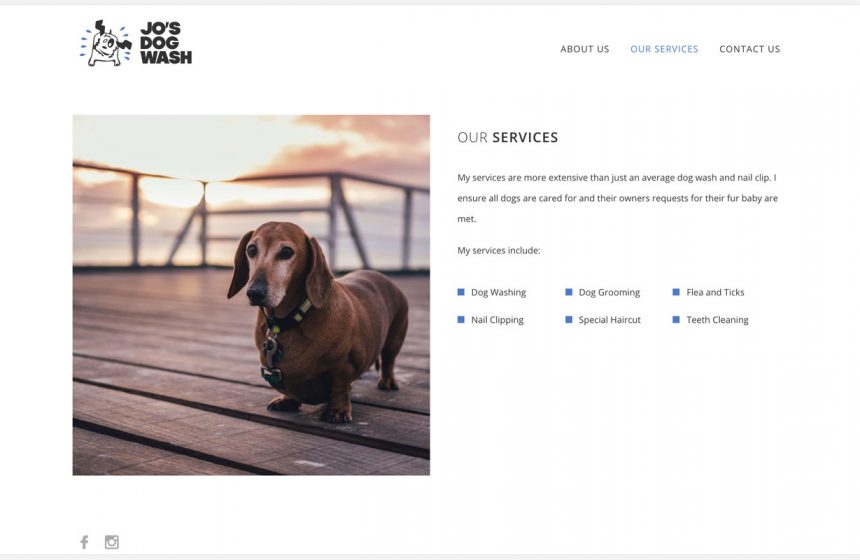
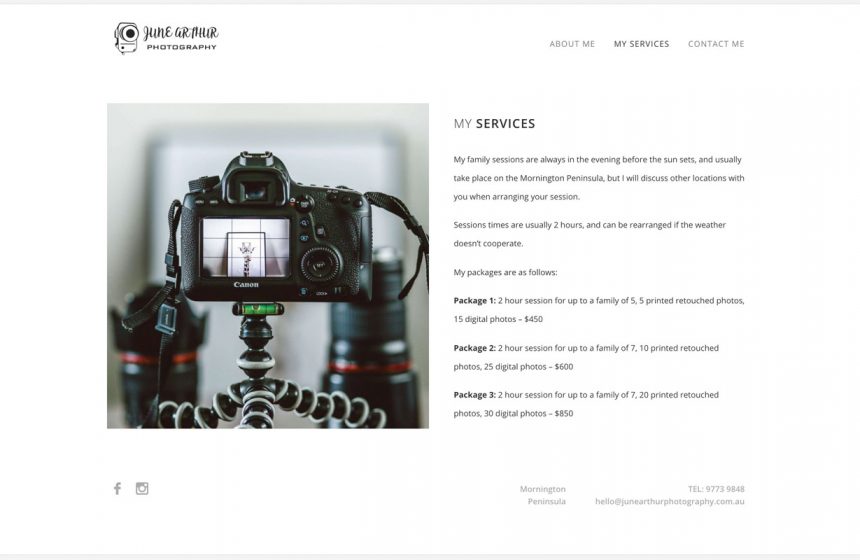
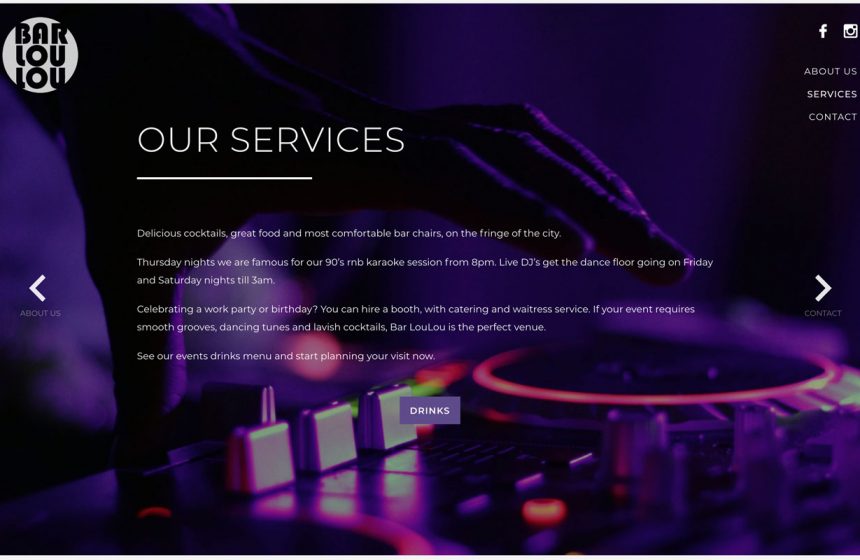
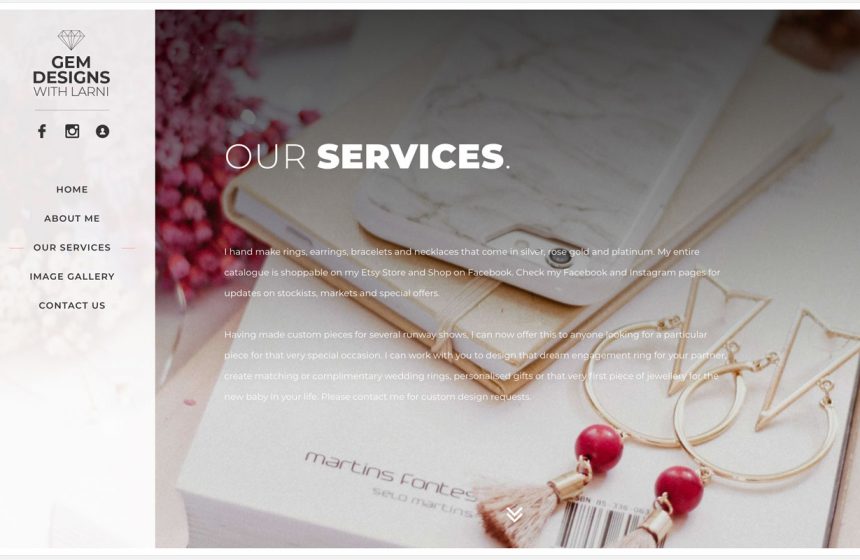
Services page copy and/or image
- Login to your website (we sent you login details when your site went live).
- Click on ‘Pages’ from the left hand menu.
- Click on the ‘Home’ page.
- Click on the ‘Slides’ tab.
- Scroll down to ‘Content Services’.
- To change the image displayed on your Services page, hover over the image and click on the red cross to remove it. Then click on ‘Add Image’ to select the new image from your Media Library. (Upload your image to the Media Library now if you’re adding a new image). If you only wanted to change your image, click ‘Update’ to put it on the live site.
- To edit the copy, scroll to the ‘Text’ area. Depending on whether you chose to explain your services in a couple of paragraphs or if you used a Display List (bullet points or boxes) will depend on what you update here.
- If you only have paragraph copy in the Text box, simply edit your text and when finished, click on ‘Update’ to put it live.
If you have a Display List, showing either bullet points or boxes, follow the instructions below on how to update / add / delete your services list.

Services box list on Services page
Listing your services in boxes are suitable for businesses that have one to two word descriptions of their services.
- Login to your website (we sent you login details when your site went live).
- Click on ‘Pages’ from the left hand menu.
- Click on the ‘Home’ page.
- Click on the ‘Slides’ tab.
- Scroll down to ‘Content Services’ area. The ‘Text’ area may have an introductory sentence or paragraph before your list of services, simply edit the text here and continue on to your list below.
- If you want to edit your services that are listed in boxes on your Services page, go to the ‘List’ area.
- To edit existing copy, simply click on the text in the list and edit.
- To add a new service, click on ‘Add List Item’ button and fill in the relevant text.
- To delete a service box, hover to the right of the box and click on the red ‘Remove row’ link.
- To re-order your services, hover over the number on the left hand side, and when you have the 4 sided arrow, simply click and drag the box up or down.
- When finished, click on the ‘Update’ button to put it live.
Services bullet point list on Services
Listing your services as bullet points are great for businesses that have short sentences to describe each service.
- Login to your website (we sent you login details when your site went live).
- Click on ‘Pages’ from the left hand menu.
- Click on the ‘Home’ page.
- Click on the ‘Slides’ tab.
- Scroll down to ‘Content Services’ area. The ‘Text’ area may have an introductory sentence or paragraph before your list of services, simply edit the text here and continue on to your list below.
- If you want to edit your services that are listed as bullet points on your Services page, scroll down to the ‘List’ area.
- To edit existing copy, simply click on the text in the list and edit.
- To add a new service, click on ‘Add List Item’ button and fill in the relevant text.
- To delete a bullet point, hover to the right of the box and click on the red ‘Remove row’ link.
- To re-order your services, hover over the number on the left hand side, and when you have the 4 sided arrow, simply click and drag the box up or down.
- When finished, click on the ‘Update’ button to put it live.

Adding a PDF download on your Services page
You may already have a PDF download visible on your Webbie.com.au website that we set up at the beginning. Or you may want to add a PDF download to show a price list, menu or more expansive list of Services. Follow the steps on how to do this:
- Login to your website (we sent you login details when your site went live).
- Click on ‘Pages’ from the left hand menu.
- Click on the ‘Home’ page.
- Click on the ‘Slides’ tab.
- Scroll down to ‘Content Services’ area.
- If you have an existing PDF Download, the blue button toggle will be set to ‘Yes’, your Download PDF Text will be filled in, and your PDF file will be displayed below.
- Therefore, to upload a new PDF to replace the existing one, hover over the file box and click on the red cross to delete it.
- Then click on ‘Add File’ and choose it from your Media Library or add it to your Media Library. Then click ‘Update’ to put it on the live site.
- If you want to display a PDF for the first time, click on the Download PDF Button to change it from ‘No’ to ‘Yes’.
- Enter Download PDF Text, for example, ‘Price List’, or ‘Our Menu’
- Add your PDF, by clicking on ‘Add File’ and choosing it from your Media Library (or upload onto the Media Library and select it).
- Click on the main page ‘Update’ button to put it on the live site.
Services page copy/box/bullet list display
- If your Display List toggle is currently set to ‘No’ but you want to list your services as in a more compact way, for example, you only want to have 1 – 2 word descriptions, then click on the toggle to ‘Yes’.
- You will now see ‘List Type’ and ‘List’. Select a List Type from the drop down menu. ‘Boxes’ display your services inside boxes. ‘Bullets’ display your services as a bullet list.
- Now you’re ready to add your services. Click on ‘Add List Item’ and type in the number 1 box. To continue adding services click on ‘Add List Item’. We recommend 8 to 12 items depending on your intro text, with only 1 or 2 words.
- Once you’ve finished making updates, click on the ‘Update’ button to publish it to your live site.

Updating the Menu / Navigation
Be careful about how you label your website menu or navigation. It should only be one word ideally, and it needs to be clear for your audience. If you label your page ‘information’, that could relate to many things in your business.
Instead, try and describe exactly what content is on that page. If you offer services to your customers, calling the page ‘Services’ makes sense. But, if you are a restaurant, then ‘Menu’ or ‘Food’ would work better, where you can describe the type of food you serve and have a link to your menu.
Follow the steps above to login and navigate to your ‘Home’ page.
- Login to your website (we sent you login details when your site went live).
- Click on ‘Pages’ from the left hand menu.
- Click on ‘Home’ page.
- Click on the ‘Site Navigation’ tab.
- There are 3 menu/nav items that you can update.
- Once you are finished, click ‘Update’ to make it live.
Updating Social Media links
- Login to your website (we sent you login details when your site went live).
- Click on ‘Pages’ from the left hand menu.
- Click on ‘Home’ page.
- Click on the ‘Social Media’ tab.
- There are 5 links you can update – Facebook, Twitter, Instagram, LinkedIn and Other, which you can put any link in, such as Shedul, TripAdvisor or Etsy.
- Enter the URL of your social media page into each relevant box.
- Once you are finished, click ‘Update’ to make it live.
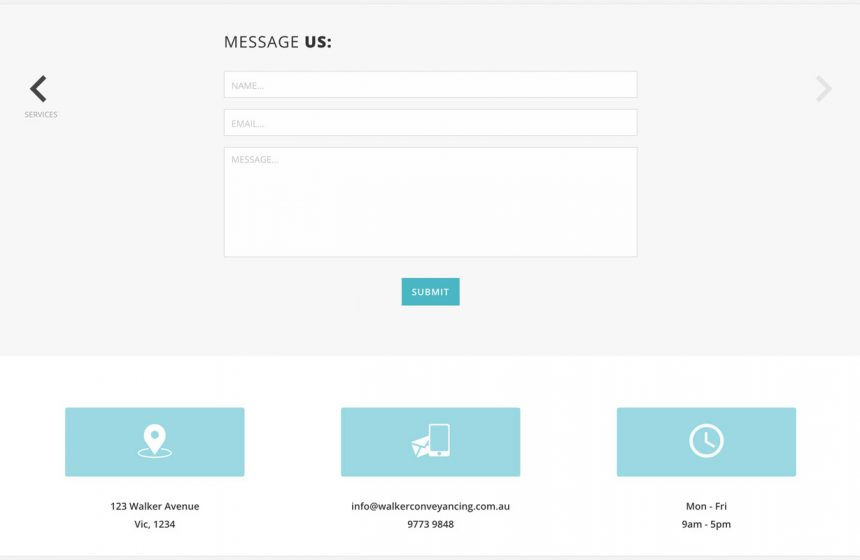
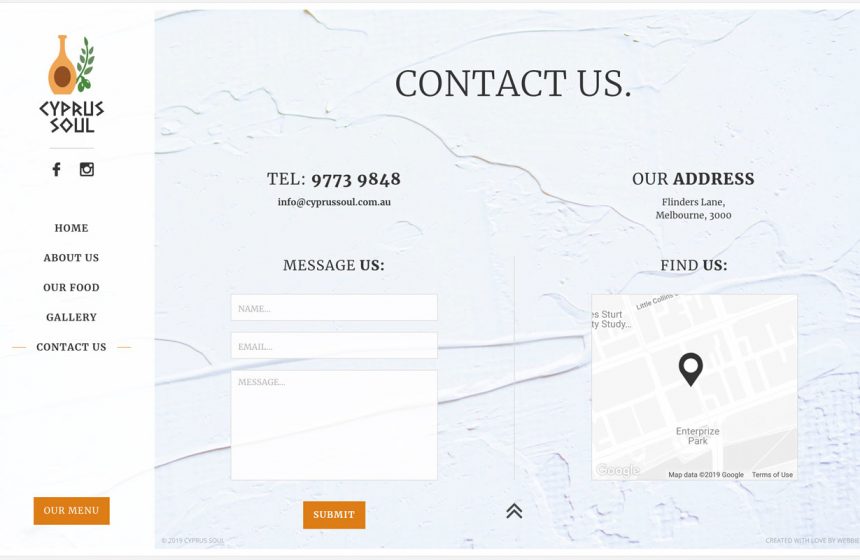
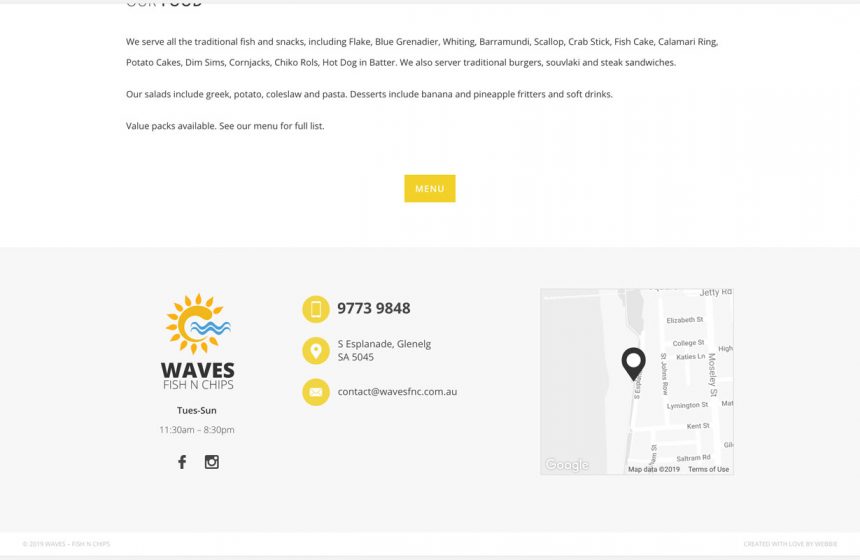
Updating your Address, Opening Hours or Contact Information
- Login to your website (we sent you login details when your site went live).
- Click on ‘Pages’ from the left hand menu.
- Click on ‘Home’ page.
- Click on the ‘Footer’ tab.
- There are a maximum of 3 options for which content you want to display – Address, Opening hours and Contact Information. You can choose what you want to display on your website.
- To remove or add one of these 3 options, hover to the right of each item and you will have a red ‘Remove row’ or grey ‘Add row’. Click on the ‘Remove row’ to remove the content. To add an option in, click ‘Add row’ and select the content from the drop down.
- You can only edit the opening hours on this tab. Try to keep it short as it displays in the footer.
- To edit your address or Contact Information, click on the ‘Customer Details’ tab (just below the Footer tab you are on).
- The information entered here is what displays in your footer and contact page.
- If you want to update your displayed business address, business email, business phone number, you do this here.
- Once you are finished, click ‘Update’ to make it live.
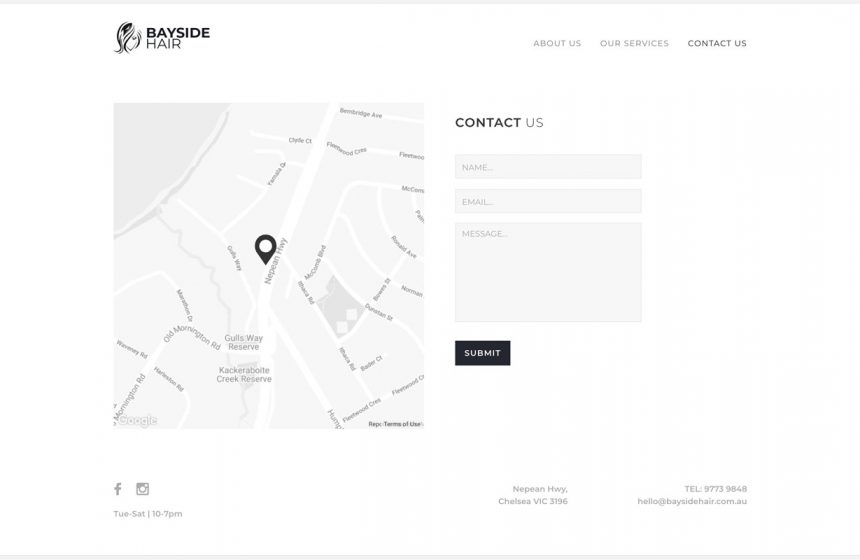
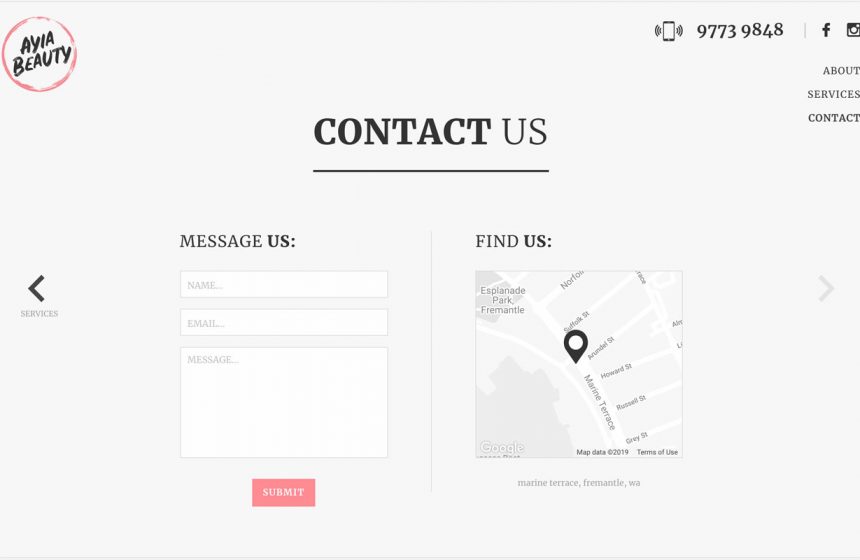
Updating your Google Map or Adding / Deleting your Google Map
- Login to your website (we sent you login details when your site went live).
- Click on ‘Pages’ from the left hand menu.
- Click on the ‘Home’ page.
- Click on the ‘Google Maps’ tab.
- There have the option to display a map or not. If you’re a home based business, you may not want your business location displayed. But, if you’re a salon, cafe or shop, you definitely want to give this information to your customers.
- You may already be displaying a Google Map when your site went live. If this is the case and you simply want to change your address (because your business moved for example), then you need to enter your new address in the field right above the map. Google will automatically recognise the address and provide it in a drop down. Please select this in the drop down to select the address Google recognises. Then click on ‘Update’ to make it live on your site.
- If you don’t want to display a Google Map anymore, simply change the blue ‘Yes’ button to ‘No’ under the heading ‘Display Google Map’ and hit ‘Update’ to make it live.
- If you want to display a Google Map and currently aren’t displaying one, toggle the Display Google Map button from ‘No’ to ‘Yes’.
- Then enter your address in the field directly above the map, and select the address Google displays in the drop down.
- Once you are finished, click ‘Update’ to make it live.
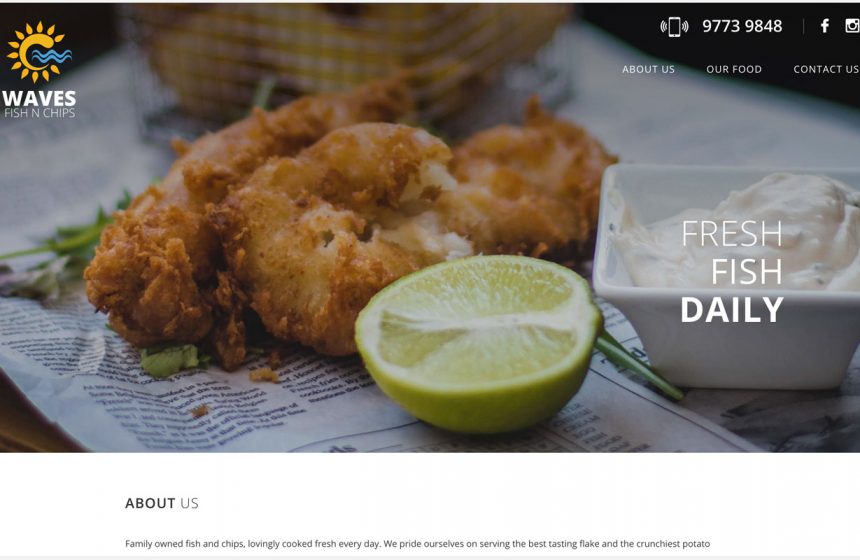
Impact Website Guides
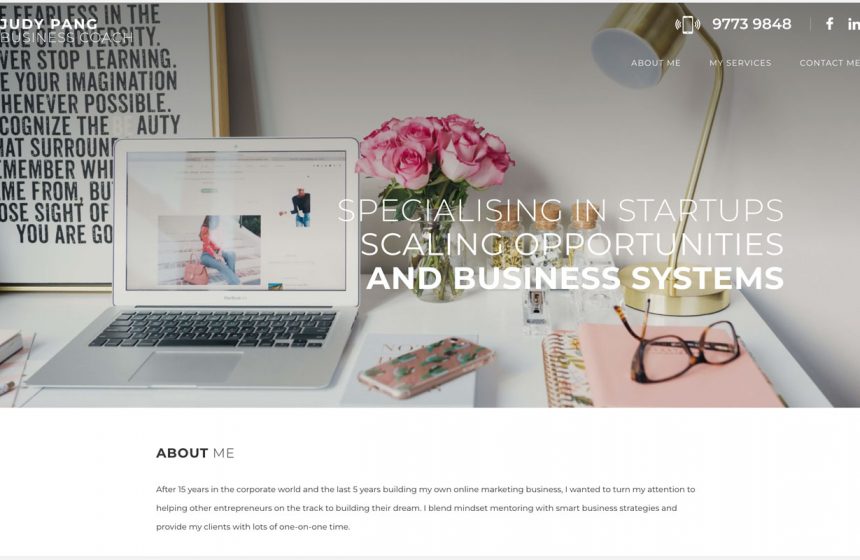
Home page image
- Login to your website (we sent you login details when your site went live).
- Click on ‘Pages’ from the left hand menu.
- Click on ‘Home’ page.
- Click on the ‘Site Slides’ tab. The Homepage image is in the first box called ‘Image’.
- To remove the image, hover over the image and click on the red cross.
- To add a new image from your Media library, click on ‘Add Image’ button and select the image from the library, then click on the ‘Select’ button.
- Once you’ve finished making the updates you wanted, click on the ‘Update’ button to publish it to your live site.

Home page copy
- Login to your website (we sent you login details when your site went live).
- Click on ‘Pages’ from the left hand menu.
- Click on ‘Home’ page.
- Click on the ‘Site Slides’ tab, and scroll down to Header. The header should only be one or two words to title the page if possible. We recommend using bold to emphasize the key word.
- To edit the about/intro copy on your home page, simply edit the text in the ‘Text’ field.
- Once you’re happy, click on the ‘Update’ button to publish it live.
Services page image and copy
- Login to your website (we sent you login details when your site went live).
- Click on ‘Pages’ from the left hand menu.
- Click on ‘Home’ page.
- Click on the ‘Site Slides’ tab.
- Scroll down to ‘2 Content Services’ box to edit your Services page content.
- To change the image, hover over the image and click on the red cross.
- To add a new image from your Media library, click on ‘Add Image’ button and select the image from the library, then click on the ‘Select’ button.
- To edit the page header, simply click on the text and change it to what you want. We recommend only one to two words here, and making one key word bold looks good!
- To edit the intro copy on your services page, simply edit the text in the ‘Text’ field.
- Once you’re happy, click on the ‘Update’ button to publish it live.

Services box list on Services page
Listing your services in boxes are suitable for businesses that have one to two word descriptions of their services.
- Login to your website (we sent you login details when your site went live).
- Click on ‘Pages’ from the left hand menu.
- Click on the ‘Home’ page.
- Click on the ‘Site Slides’ tab.
- Scroll down to ‘2 Content Services’ area. If your site currently is displaying a List with List Type ‘Boxes’ selected in the drop down then you currently have a box list on your Services page.
- To edit existing box copy, simply click on the text in the list and edit.
- To add a new service, click on ‘Add List Item’ button and fill in the relevant text.
- To delete a service box, hover to the right of the box and click on the red ‘Remove row’ link.
- To re-order your services, hover over the number on the left hand side, and when you have the 4 sided arrow, simply click and drag the box up or down.
- When finished, click on the ‘Update’ button to put it live.

Services bullet point list on Services
Listing your services as bullet points are great for businesses that have short sentences to describe each service.
- Login to your website (we sent you login details when your site went live).
- Click on ‘Pages’ from the left hand menu.
- Click on the ‘Home’ page.
- Click on the ‘Site Slides’ tab.
- Scroll down to ‘2 Content Services’ area. If your site currently is displaying a List with List Type ‘Bullets’ selected in the drop down then you currently have a bullet list on your Services page.
- To edit an existing bullet point, simply click on the text in the list and edit.
- To add a new service, click on ‘Add List Item’ button and fill in the relevant text.
- To delete a service, hover to the right of the box and click on the red ‘Remove row’ link.
- To re-order your services, hover over the number on the left hand side, and when you have the 4 sided arrow, simply click and drag the box up or down.
- When finished, click on the ‘Update’ button to put it live.
Adding a PDF download on your Services page
You may already have a PDF download visible on your Webbie website that we set up at the beginning. Or you may want to add a PDF download to show a price list, menu or more expansive list of Services. Follow the steps on how to do this:
- Login to your website (we sent you login details when your site went live).
- Click on ‘Pages’ from the left hand menu.
- Click on the ‘Home’ page.
- Click on the ‘Slides’ tab.
- Scroll down to ‘Content Services’ area.
- If you have an existing PDF Download, the blue button toggle will be set to ‘Yes’, your Download PDF Text will be filled in, and your PDF file will be displayed below.
- Therefore, to upload a new PDF to replace the existing one, hover over the file box and click on the red cross to delete it.
- Then click on ‘Add File’ and choose it from your Media Library or add it to your Media Library. Then click ‘Update’ to put it on the live site.
- If you want to display a PDF for the first time, click on the Download PDF Button to change it from ‘No’ to ‘Yes’.
- Enter Download PDF Text, for example, ‘Price List’, or ‘Our Menu’
- Add your PDF, by clicking on ‘Add File’ and choosing it from your Media Library (or upload onto the Media Library and select it).
- Click on the main page ‘Update’ button to put it on the live site.
Services page copy/box/bullet list display
- If your Display List toggle is currently set to ‘No’ but you want to list your services as in a more compact way, for example, you only want to have 1 – 2 word descriptions, then click on the toggle to ‘Yes’.
- You will now see ‘List Type’ and ‘List’. Select a List Type from the drop down menu. ‘Boxes’ display your services inside boxes. ‘Bullets’ display your services as a bullet list.
- Now you’re ready to add your services. Click on ‘Add List Item’ and type in the number 1 box. To continue adding services click on ‘Add List Item’. We recommend 8 to 12 items depending on your intro text, with only 1 or 2 words.
- Once you’ve finished making updates, click on the ‘Update’ button to publish it to your live site.

Updating the Menu / Navigation
Be careful about how you label your website menu or navigation. It should only be one word ideally, and it needs to be clear for your audience. If you label your page ‘information’, that could relate to many things in your business.
Instead, try and describe exactly what content is on that page. If you offer services to your customers, calling the page ‘Services’ makes sense. But, if you are a restaurant, then ‘Menu’ or ‘Food’ would work better, where you can describe the type of food you serve and have a link to your menu.
- Login to your website (we sent you login details when your site went live).
- Click on ‘Pages’ from the left hand menu.
- Click on ‘Home’ page.
- Click on the ‘Site Navigation’ tab.
- There are 3 menu/nav items that you can update, Home/About, Services and Contact.
- Once you are finished, click ‘Update’ to make it live.
Updating Social Media links
- Login to your website (we sent you login details when your site went live).
- Click on ‘Pages’ from the left hand menu.
- Click on ‘Home’ page.
- Click on the ‘Social Media’ tab.
- There are 5 links you can update – Facebook, Twitter, Instagram, LinkedIn and Other, which you can put any link in, such as Shedul, TripAdvisor or Etsy.
- Enter the URL of your social media page into each relevant box.
- Once you are finished, click ‘Update’ to make it live.
Updating your Address, Opening Hours or Contact Information
- Login to your website (we sent you login details when your site went live).
- Click on ‘Pages’ from the left hand menu.
- Click on ‘Home’ page.
- Click on the ‘Footer’ tab.
- There are a maximum of 3 options for which content you want to display – Address, Opening hours and Contact Information. You can choose what you want to display on your website.
- To remove or add one of these 3 options, hover to the right of each item and you will have a red ‘Remove row’ or grey ‘Add row’. Click on the ‘Remove row’ to remove the content. To add an option in, click ‘Add row’ and select the content from the drop down.
- You can only edit the opening hours on this tab. Try to keep it short as it displays in the footer.
- To edit your address or Contact Information, click on the ‘Customer Details’ tab (just below the Footer tab you are on).
- The information entered here is what displays in your footer and contact page.
- If you want to update your displayed business address, business email, business phone number, you do this here.
- Once you are finished, click on ‘Update’ to make it live.
Updating your Google Map or Adding / Deleting your Google Map
- Login to your website (we sent you login details when your site went live).
- Click on ‘Pages’ from the left hand menu.
- Click on ‘Home’ page.
- Click on the ‘Google Maps’ tab.
- There have the option to display a map or not. If you’re a home based business, you may not want your business location displayed. But, if you’re a salon, cafe or shop, you definitely want to give this information to your customers.
- You may already be displaying a Google Map when your site went live. If this is the case and you simply want to change your address (because your business moved for example), then you need to enter your new address in the field right above the map. Google will automatically recognise the address and provide it in a drop down. Please select this in the drop down to select the address Google recognises. Then click on ‘Update’ to make it live on your site.
- If you don’t want to display a Google Map anymore, simply change the blue ‘Yes’ button to ‘No’ under the heading ‘Display Google Map’ and hit ‘Update’ to make it live.
- If you want to display a Google Map and currently aren’t displaying one, toggle the Display Google Map button from ‘No’ to ‘Yes’.
- Then enter your address in the field directly above the map, and select the address Google displays in the drop down.
- Once you are finished, click ‘Update’ to make it live.
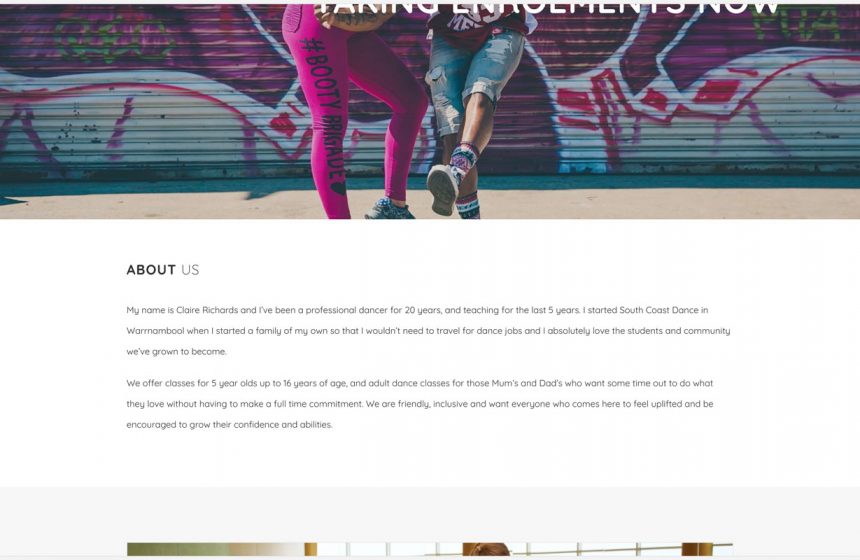
Limelight Website Guides
Home page headline
If you chose the Limelight Webbie website, then you will have seen the 3 word format we designed for this style. You may have had your own 3 words in mind to use for your business. When filling in your form when purchasing the website, we had a field for a tag line. If you entered 3 words there, than we would have used those and all is good in the world!
Otherwise, we may have taken 3 key words from your longer tag line to use for your home page. If you want to change these, you can by following the steps below. Please note – 3 words work best, they automatically have a full stop after each word, and increase in boldness level automatically.
- Login to your website (we sent you login details when your site went live).
- Click on ‘Pages’ from the left hand menu.
- Click on ‘Home’ page.
- Click on the Slides’ tab. The Tag Line is the first thing you will see at the top of the page, which you would have provided when you purchased your website.
- To edit the 3 words on your home page, simply edit the text in the ‘Text’ field whilst maintaining the layout and format, e.g. one word on each line, no additional formatting required.
- Once you’re happy, click on the ‘Update’ button to publish it live.

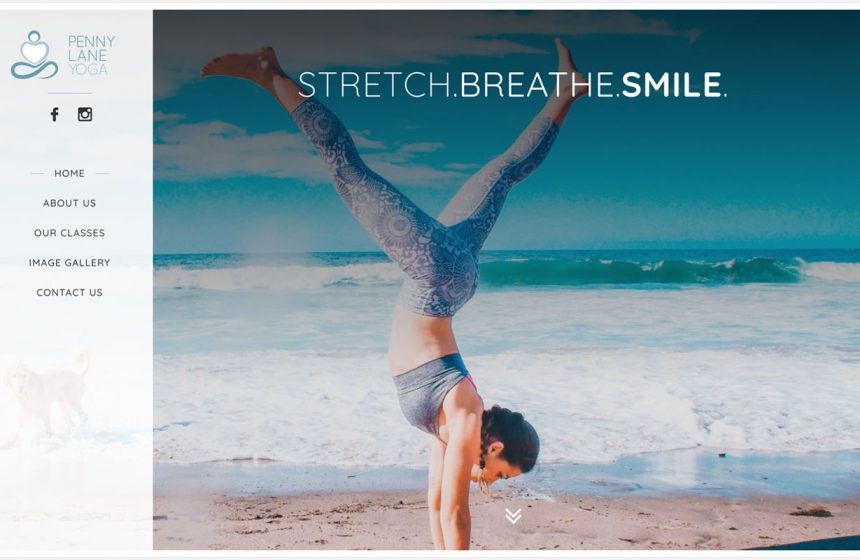
Home page image
- Login to your website (we sent you login details when your site went live).
- Click on ‘Pages’ from the left hand menu.
- Click on ‘Home’ page.
- Click on the ‘Slides’ tab. The Homepage image is in the second box called ‘1 Content Homepage’.
- To remove the image, hover over the image and click on the red cross.
- To add a new image from your Media library, click on ‘Add Image’ button and select the image from the library, then click on the ‘Select’ button.
- Once you’ve finished making the updates you wanted, click on the ‘Update’ button to publish it to your live site.
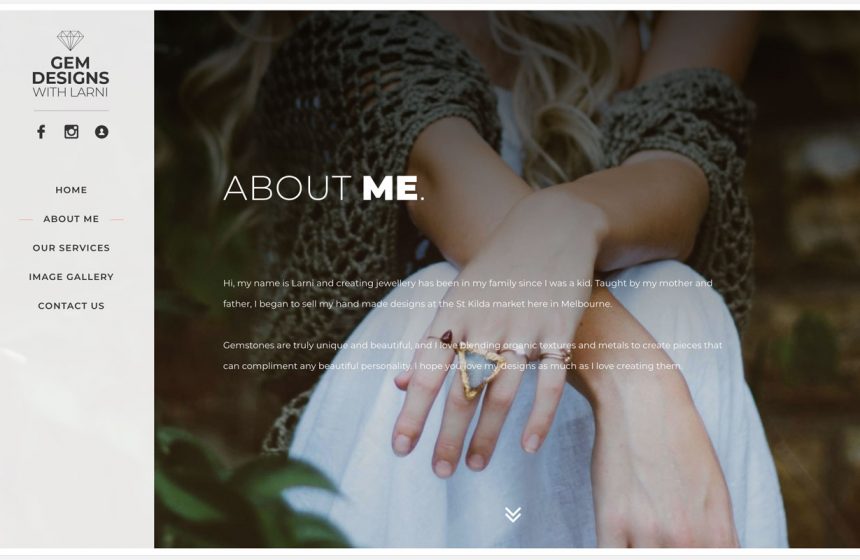
About page image and copy
- Login to your website (we sent you login details when your site went live).
- Click on ‘Pages’ from the left hand menu.
- Click on ‘Home’ page.
- Click on the ‘Slides’ tab.
- Scroll down to ‘2 Content About’ box to edit your About page content.
- To change the image, hover over the image and click on the red cross.
- To add a new image from your Media library, click on ‘Add Image’ button and select the image from the library, then click on the ‘Select’ button.
- To edit the page header, simply click on the text and change it to what you want. We recommend only one to two words here, and making one key word bold looks good!
- To edit the intro copy on your About page, simply edit the text in the ‘Text’ field.
- Once you’re happy, click on the ‘Update’ button to publish it live.

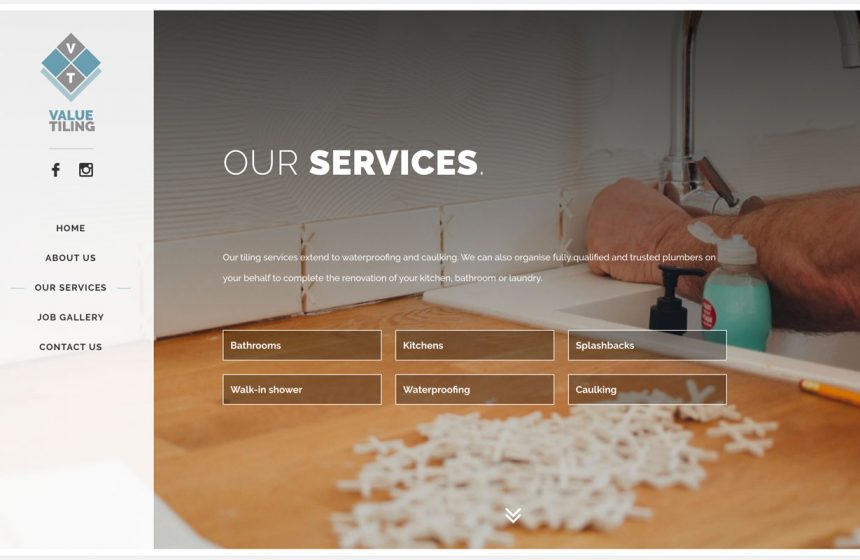
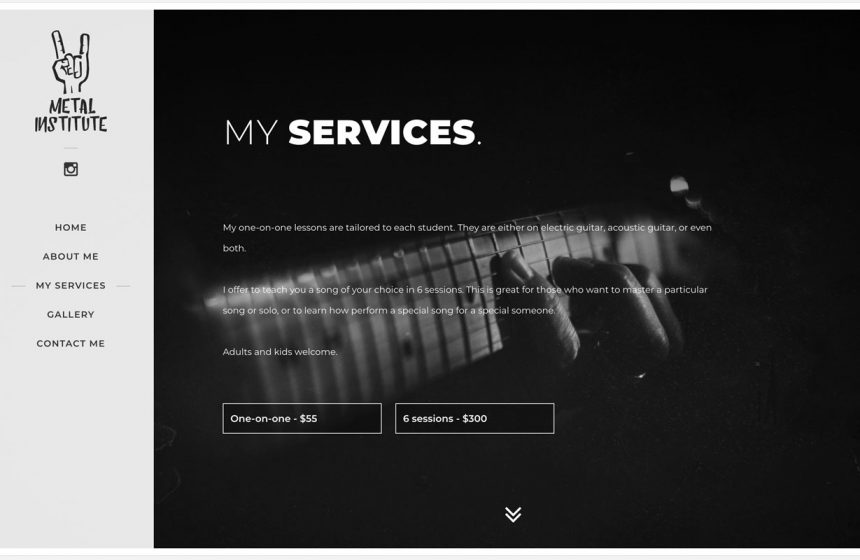
Services page image and copy
- Login to your website (we sent you login details when your site went live).
- Click on ‘Pages’ from the left hand menu.
- Click on ‘Home’ page.
- Click on the ‘Slides’ tab.
- Scroll down to ‘3 Content Services’ box to edit your Services page content.
- To change the image, hover over the image and click on the red cross.
- To add a new image from your Media library, click on ‘Add Image’ button and select the image from the library, then click on the ‘Select’ button.
- To edit the page header, simply click on the text and change it to what you want. We recommend only one to two words here, and making one key word bold looks good!
- To edit the intro copy on your Services page, simply edit the text in the ‘Text’ field.
- Once you’re happy, click on the ‘Update’ button to publish it live.
Services box list on Services page
Listing your services in boxes are suitable for businesses that have one to two word descriptions of their services.
- Login to your website (we sent you login details when your site went live).
- Click on ‘Pages’ from the left hand menu.
- Click on the ‘Home’ page.
- Click on the ‘Slides’ tab.
- Scroll down to ‘3 Content Services’ area. If your site currently is displaying a List with List Type ‘Boxes’ selected in the drop down then you currently have a box list on your Services page.
- To edit existing box copy, simply click on the text in the list and edit.
- To add a new service, click on ‘Add List Item’ button and fill in the relevant text.
- To delete a service box, hover to the right of the box and click on the red ‘Remove row’ link.
- To re-order your services, hover over the number on the left hand side, and when you have the 4 sided arrow, simply click and drag the box up or down.
- When finished, click on the ‘Update’ button to put it live.
Services page copy/box/bullet list display
- Login to your website (we sent you login details when your site went live).
- Click on ‘Pages’ from the left hand menu.
- Click on the ‘Home’ page.
- Click on the ‘Slides’ tab.
- Scroll down to ‘3 Content Services’ area, and scroll down to ‘Display List’. If your Display List toggle is currently set to ‘No’ but you want to list your services as in a more compact way, for example, you only want to have 1 – 2 word descriptions, then click on the toggle to ‘Yes’.
- You will now see ‘List Type’ and ‘List’. Select a List Type from the drop down menu. ‘Boxes’ display your services inside boxes. ‘Bullets’ display your services as a bullet list.
- Now you’re ready to add your services. Click on ‘Add List Item’ and type in the number 1 box. To continue adding services click on ‘Add List Item’. We recommend 8 to 12 items depending on your intro text, with only 1 or 2 words.
- Once you’ve finished making updates, click on the ‘Update’ button to publish it to your live site.
Updating the Gallery
- Login to your website (we sent you login details when your site went live).
- Click on ‘Pages’ from the left hand menu.
- Click on the ‘Home’ page.
- Click on the ‘Slides’ tab.
- Scroll down to ‘4 Content Gallery’.
- The header should only be 1 or 2 words, and you can emphasise one word by adding ‘bold’ text affect. You can edit the name of the Gallery here if you wish.
- The Gallery images are shown in the Gallery box.
- To add a new image, click on ‘Add to gallery’ button and drag/upload your new image to the Media Library. Complete the Title and Alt Text fields and click on ‘Select’.
- If you want to change the order in which the images appear on your slider, click directly on the image to select the image and drag it to another position.
- To delete an image, hover your cursor over it and click on the red cross.
- You can also swap the order in which your images show, by clicking and dragging the image left/right/up/down.
- Once you’ve finished making the updates you wanted, click on the ‘Update’ button to publish it to your live site.
Updating the Menu / Navigation
Be careful about how you label your website menu or navigation. It should only be one word ideally, and it needs to be clear for your audience. If you label your page ‘information’, that could relate to many things in your business. Instead, try and describe exactly what content is on that page.
You might find a more suitable description for this page depending on your business. If you offer services to your customers, calling the page ‘Services’ makes sense. But, if you run classes, then ‘Our Classes’ would work better, for example.
- Login to your website (we sent you login details when your site went live).
- Click on ‘Pages’ from the left hand menu.
- Click on ‘Home’ page.
- Click on the ‘Site Navigation’ tab.
- There are 5 menu/nav items that you can update, Home, About, Services, Gallery and Contact.
- Once you are finished, click ‘Update’ to make it live.

Adding a PDF download to your menu
You may already have a PDF download visible on your Webbie website that we set up at the beginning. Or you may want to add a PDF download to show a price list, menu or more expansive list of Services.
- Login to your website (we sent you login details when your site went live).
- Click on ‘Pages’ from the left hand menu.
- Click on the ‘Home’ page.
- Click on the ‘Site Navigation’ tab.
- Scroll down to ‘Download PDF Button’.
- If you have an existing PDF Download, the blue button toggle will be set to ‘Yes’, your Download PDF Text will be filled in, and your PDF file will be displayed below it.
- Therefore, to upload a new PDF to replace the existing one, hover over the file box and click on the red cross to delete it.
- Then click on ‘Add File’ and choose it from your Media Library or add it to your Media Library. Then click ‘Update’ to put it on the live site.
- If you want to display a PDF for the first time, click on the Download PDF Button to change it from ‘No’ to ‘Yes’.
- Enter Download PDF Text, for example, ‘Price List’, or ‘Our Menu’
- Add your PDF, by clicking on ‘Add File’ and choosing it from your Media Library (or upload onto the Media Library and select it).
- Click on the main page ‘Update’ button to put it on the live site.
Updating Social Media links
- Login to your website (we sent you login details when your site went live).
- Click on ‘Pages’ from the left hand menu.
- Click on ‘Home’ page.
- Click on the ‘Social Media’ tab.
- There are 5 links you can update – Facebook, Twitter, Instagram, LinkedIn and Other, which you can put any link in, such as Shedul, TripAdvisor or Etsy.
- Enter the URL of your social media page into each relevant box.
- Once you are finished, click ‘Update’ to make it live.

Updating your Contact page
The Contact page for the Limelight Webbie website requires a business telephone number and address. It also works best if you have an email address as well. If you don’t have a business location that you want people to know, you could fill in the area you service.
- Login to your website (we sent you login details when your site went live).
- Click on ‘Pages’ from the left hand menu.
- Click on ‘Home’ page.
- Click on the ‘Customer Details’ tab. The information entered here is what displays on your contact page.
- Update your displayed business address, business email or business phone number in the relevant fields.
- Once you are finished, click on ‘Update’ to make it live.
Updating your Google Map or Adding / Deleting your Google Map
- Login to your website (we sent you login details when your site went live).
- Click on ‘Pages’ from the left hand menu.
- Click on ‘Home’ page.
- Click on the ‘Google Maps’ tab.
- There have the option to display a map or not. If you’re a home based business, you may not want your business location displayed. But, if you’re a salon, cafe or shop, you definitely want to display a map with directions for your customers.
- You may already be displaying a Google Map when your site went live. If this is the case and you simply want to change your address (because your business moved for example), then you need to enter your new address in the field right above the map. Google will automatically recognise the address and provide it in a drop down. Please select this in the drop down to select the address Google recognises. Then click on ‘Update’ to make it live on your site.
- If you don’t want to display a Google Map anymore, simply change the blue ‘Yes’ button to ‘No’ under the heading ‘Display Google Map’ and hit ‘Update’ to make it live.
- If you want to display a Google Map and currently aren’t displaying one, toggle the Display Google Map button from ‘No’ to ‘Yes’.
- Then enter your address in the field directly above the map, and select the address Google displays in the drop down.
- Once you are finished, click ‘Update’ to make it live.
Clarity Website Guides
Header image
- Login to your website (we sent you login details when your site went live).
- Click on ‘Pages’ from the left hand menu.
- Click on ‘Home’ page.
- Click on the ‘Site Content’ tab. The header image is in the first box called ‘Hero’ and ‘Hero Image’. You may need to click on ‘Hero’ to expand the content box.
- To change the image, you need to remove it first by hovering over the image and clicking on the red cross.
- To add a new image from your Media library, click on ‘Add Image’ button and select the image from the library, then click on the ‘Select’ button.
- Once you’ve finished making the updates you wanted, click on the ‘Update’ button to publish it to your live site.
Header tag line
You have a few choices on how to display your tag line in your header.
Examples include:
3 single words
A few words on 2 lines
3 lines of copy
One bold headline
Choose the one that suits your tagline best. Keeping it short is the best way to go!
- Login to your website (we sent you login details when your site went live).
- Click on ‘Pages’ from the left hand menu.
- Click on ‘Home’ page.
- Click on the ‘Site Content’ tab.
- You may need to click on ‘Hero’ to expand the content box.The Tag Line is just under the image at the top. This is the tag line you would have provided when you purchase your Webbie website. If you didn’t provide one, it will be blank.
- Underneath is the Custom Tag Line that is being used on your website header. This will either be a direct copy of the tag line you provided, or an edited version of it. If you didn’t provide a tag line, we may have created a short one for you.
- To edit the tag line on your home page, simply edit the text in the ‘Custom Tag Line’ field whilst maintaining the layout and format, e.g. one word on each line, or 2 sentences on 2 lines etc. (as per the above examples) with no additional formatting required.
- You can click on the ‘Preview Changes’ button to check your tag line before
- Once you’re happy, click on the ‘Update’ button to publish it live.
About section copy
- Login to your website (we sent you login details when your site went live).
- Click on ‘Pages’ from the left hand menu.
- Click on ‘Home’ page.
- Click on the ‘Site Content’ tab.
- Click on ‘Section One’ to expand the content box for your About page.
- To edit the copy, simply click on the text and change it to what you want. We recommend a few short paragraphs.
- Once you’re happy, click on the ‘Update’ button to publish it live.
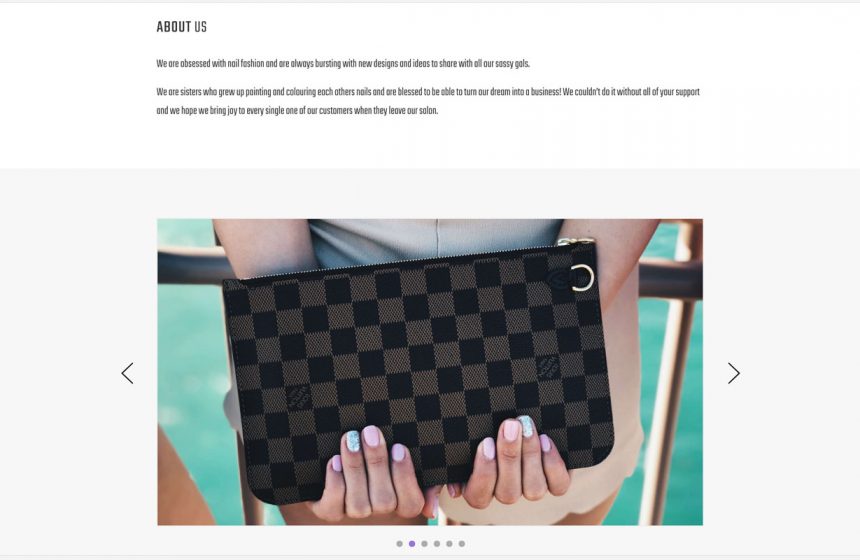
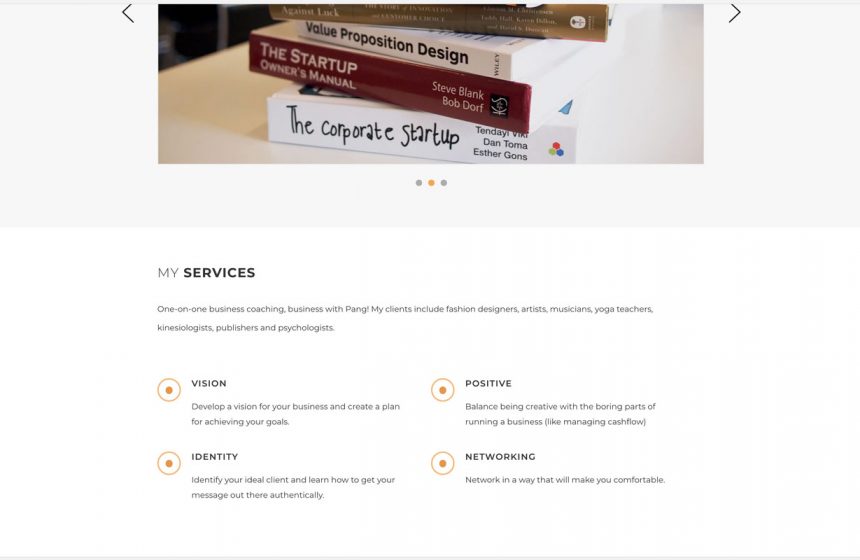
Image slider
- Login to your website (we sent you login details when your site went live).
- Click on ‘Pages’ from the left hand menu.
- Click on ‘Home’ page.
- Click on the ‘Site Content’ tab.
- Click on ‘Section Slider’ to expand the content box to view the image slider.
- You have the choice to show 3 smaller size images at one time, or one larger image at one time. If you have nice high resolution imagery that shows off your services or products, than we recommend using the ‘1 slide visible’ setting. If your imagery is more to provide examples and a feel for your business, or you only have low resolution images, then perhaps using the ‘3 thumbnails’ setting is more suitable.
- To delete an image, hover over the image and click on the red cross.
- To add a new image from your Media library, click on ‘Add Image’ button and select the image from the library, then click on the ‘Select’ button.
- To change the order of your images, click and drag the image.
- Once you’re happy, click on the ‘Update’ button to publish it live.
Services page copy
You have many options on how to display your Services. The first option is to write either an introductory sentence or several paragraphs about the services or products your company offers. Follow the steps to edit this copy:
- Login to your website (we sent you login details when your site went live).
- Click on ‘Pages’ from the left hand menu.
- Click on ‘Home’ page.
- Click on the ‘Site Content’ tab.
- Click on ‘Section Two’ to expand the services content box.
- The first box contains the text used in your Services section.
- Simply edit the text here as you wish.
- Once you’re happy, click on the ‘Update’ button to publish it live.
Services two column bulleted points
Listing your services as bullet points are suitable if you have only a few words or larger lists or sentences to describe each service.
- Login to your website (we sent you login details when your site went live).
- Click on ‘Pages’ from the left hand menu.
- Click on the ‘Home’ page.
- Click on the ‘Site Content’ tab.
- Click on ‘Section Two’ to expand the services content box.
- If your website currently displays a two column bulleted list, then your ‘Display Section Two list Items?’ will be set to ‘Yes’ in the blue toggle button.
- Underneath you have the option to add a custom bullet list icon, otherwise our default bullet list style is used. For an example of a custom bullet list, view this example.
- Each bullet list has a header and text field. You can lay out your services to suit your business. View the following examples to see how you could display your services: No bulleted list 1 | No bulleted list 2 | Header and short sentence | Header and list items | Header and long paragraphs
- To add a new service, click on ‘Add Item’ button at the bottom of the section, and fill in the Item Header and Item Text.
- To delete a service, hover to the right of the box and click on the red ‘Remove row’ minus icon, and click on ‘Remove’.
- To re-order your services, hover over the number on the left hand side, and when you have the 4 sided arrow, simply click and drag the box up or down.
- When finished, click on the ‘Update’ button to make your changes live.
Services page two column bulleted list display
If you want to add or remove the two column bullet list to display your services, follow the steps below:
- Login to your website (we sent you login details when your site went live).
- Click on ‘Pages’ from the left hand menu.
- Click on the ‘Home’ page.
- Click on the ‘Site Content’ tab.
- Click on ‘Section Two’ to expand the services content box.
- Find the heading ‘Display Section Two List Items?’ and you will see a button that can be toggled to ‘Yes’ or ‘No’.
- If you are currently displaying the bullet list, toggle the button to ‘Yes’ and your Two List Items section will appear which you can then fill in.
- If you are currently displaying the bullet list, toggle the button to ‘No’ and your items will be removed.
- Once you’ve finished making updates, click on the ‘Update’ button to publish it to your live site.
Adding a PDF download in your Services section.
You may already have a PDF download visible on your Clarity Webbie website that we set up at the beginning. Or you may want to add a PDF download to show a price list, menu or more expansive list of Services.
- Login to your website (we sent you login details when your site went live).
- Click on ‘Pages’ from the left hand menu.
- Click on the ‘Home’ page.
- Click on the ‘Site Content’ tab.
- Click on ‘Section Two’ to expand the section two services area.
- Scroll down to the bottom to find the heading ‘Download PDF Button’.
- If you have an existing PDF Download, the blue button toggle will be set to ‘Yes’, your Download PDF Text will be filled in, and your PDF file will be displayed below it.
- Therefore, to upload a new PDF to replace the existing one, hover over the file box and click on the red cross to delete it.
- Then click on ‘Add File’ and choose it from your Media Library or add it to your Media Library. Then click ‘Update’ to put it on the live site.
- If you want to display a PDF for the first time, click on the Download PDF Button to change it from ‘No’ to ‘Yes’.
- Enter Download PDF Text, for example, ‘Price List’, or ‘Our Menu’.
- Add your PDF, by clicking on ‘Add File’ and choosing it from your Media Library (or upload onto the Media Library and select it).
- Click on the main page ‘Update’ button to put it on the live site.

Updating Social Media links
- Login to your website (we sent you login details when your site went live).
- Click on ‘Pages’ from the left hand menu.
- Click on ‘Home’ page.
- Click on the ‘Social Media’ tab.
- There are 5 links you can update – Facebook, Twitter, Instagram, LinkedIn and Other, which you can put any link in, such as Shedul, TripAdvisor or Etsy.
- Enter the URL of your social media page into each relevant box.
- Once you are finished, click ‘Update’ to make it live.

Updating your contact details (header and footer)
Your contact details are located at the very top of your website and at the bottom of your website (which is what someone views if they click on ‘Contact’ from your menu).
Your phone number is visible at the top, and in the larger contact area, your phone, email, business address and opening hours are displayed, along with optional Google map and social media links.
You have the option to not display opening hours and an address or even a phone number should you wish. Or you can display everything.
To edit Opening hours:
- Login to your website (we sent you login details when your site went live).
- Click on ‘Pages’ from the left hand menu.
- Click on ‘Home’ page.
- Click on the ‘Footer’ tab. The information entered here is what displays as your opening hours, located underneath your logo.
- Update your opening hours, formatting it to suit how many lines you need.
- Once you are finished, click on ‘Update’ to make it live.
To edit Contact details:
- Login to your website (we sent you login details when your site went live).
- Click on ‘Pages’ from the left hand menu.
- Click on ‘Home’ page.
- Click on the ‘Customer Details’ tab. The information entered here is what displays as your phone number, email address and business address. If you don’t enter these details, nothing is displayed on your website.
- Update your details as desired.
- Once you are finished, click on ‘Update’ to make it live.
Updating your Google Map or Adding / Deleting your Google Map
- Login to your website (we sent you login details when your site went live).
- Click on ‘Pages’ from the left hand menu.
- Click on ‘Home’ page.
- Click on the ‘Google Maps’ tab.
- There have the option to display a map or not. If you’re a home based business, you may not want your business location displayed. But, if you’re a salon, cafe or shop, you definitely want to display a map with directions for your customers.
- You may already be displaying a Google Map when your site went live. If this is the case and you simply want to change your address (because your business moved for example), then you need to enter your new address in the field right above the map. Google will automatically recognise the address and provide it in a drop down. Please select this in the drop down to select the address Google recognises. Then click on ‘Update’ to make it live on your site.
- If you don’t want to display a Google Map anymore, simply change the blue ‘Yes’ button to ‘No’ under the heading ‘Display Google Map’ and hit ‘Update’ to make it live.
- If you want to display a Google Map and currently aren’t displaying one, toggle the Display Google Map button from ‘No’ to ‘Yes’.
- Then enter your address in the field directly above the map, and select the address Google displays in the drop down.
- Once you are finished, click ‘Update’ to make it live.
Updating the Menu / Navigation
Be careful about how you label your website menu or navigation. It should only be one word ideally, and it needs to be clear for your audience. If you label your page ‘information’, that could relate to many things in your business. Instead, try and describe exactly what content is on that page.
You might find a more suitable description for this page depending on your business. If you offer services to your customers, calling the page ‘Services’ makes sense. But, if you run a restaurant, then ‘Our Menu’ would work better, for example.
- Login to your website (we sent you login details when your site went live).
- Click on ‘Pages’ from the left hand menu.
- Click on ‘Home’ page.
- Click on the ‘Site Navigation’ tab.
- There are 3 menu/nav items that you can update: About, Services and Contact.
- Once you are finished, click ‘Update’ to make it live.
Updating your logo
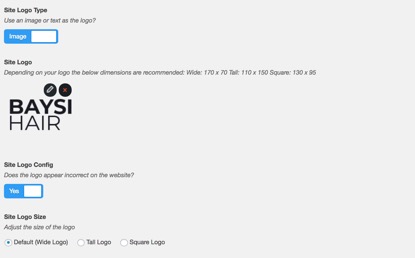
If you need to add a new logo to your website, you can in a few simple steps.
- Login to your website
- Click on ‘Pages’ from the left hand menu
- Click on ‘Home’ page
- Click on the ‘Logo’ tab
- If you have Site Logo Type set to ‘Image’:
- Under ‘Site Logo’ heading, hover over the logo image and click on the red cross to remove
- Then select ‘Add Image’ button and upload your new logo from the Media Library (you will need to upload the logo to the Media Library to be able to add it)
- Click ‘Preview’ to view how your new logo looks on the site.
- If it needs adjusting, using the ‘Site Logo Size’ buttons to best suit the shape of your logo.
- If you have Site Logo Type set to ‘Text’, then follow the above steps from Step 2.
- Once you’re happy with the new logo placement, click on ‘Update’ to finalise.
Using my email account
Your emails are hosted with a web based platform called Webmail, accessed using your site name with /webmail added to the end, (e.g. www.sitename.com.au/webmail). This allows you to login via your internet browser.
You can also add your email account to your phone or computer to access your emails more readily.
To login to your email account via Webmail:
1. The URL is the name of your site with /webmail at the end (e.g. www.sitename.com.au/webmail). Login with the details we emailed to your setup email account when you purchased a Webbie website.
2. Choose Horde, Roundcube or Squirrel Mail to view your emails and account details. They are all similar, so it wont matter too much which one you choose, and you can switch between them to find which one you like the best.
To set up your email on your computer or phone, take the following steps:
- Login via your internet browser first using the login details we provide when you purchase a Webbie website. The URL is the name of your site with /webmail at the end (e.g. www.sitename.com.au/webmail)
- Once you login, choose any of the 3 webmail layouts which are Horde, Roundcube and Squirrel Mail. They are all similar, so it wont matter too much which one you choose, and you can switch between them to find which one you like the best.
- Once you’re looking at your Mail box, click on your email address drop down menu and select ‘Configure Mail Client’.
- Follow the instructions on this page and use the relevant Incoming Server and Outgoing Server details.
- Your computer based email can be set up automatically by clicking on the relevant link.
- To set up email on your phone, go to your Email Accounts application, click on ‘Add Account’, and follow the steps to add your Incoming and Outgoing server details.
To set up a professional looking email signature:
- Click on Settings -> Identities and click on your email.
- The Edit Identity fields will display, which includes the Signature field.
- Enter your signature, which can include hyperlinks and images (make sure HTML box is ticked) and hit Save.
Maintaining site performance

Copy & SEO
Ensure your website copy describes your business, services or products clearly. Then make sure your SEO fields are completed. The Yoast SEO sections on your website pages will guide you on how to fill this out to get the most from it.
Your website doesn’t have a large amount of content, therefore you wont be able to satisfy every single element, but the most important thing is that it’s filled out as clearly as possible.

Image Compression
Another way to ensure your website performs well is to compress the size of your images. Firstly, if you are downloading an image from pexels.com, for example, choose the ‘Large’ or ‘Medium’ size which will still be high quality enough for your website, but usually wont exceed 5MB. Then to ensure the file size itself is as small as it can be, we recommend using tinypng.com. Simply upload your image (5MB and under), it compresses it, and then you can download it at a smaller size.
Following our SEO and optimisation guidelines will ensure your site is performing at it’s best and Google will favour your website in search results.
Updating my account details
If your contact details have changed since you signed up to Webbie, please contact us via our contact form advising which of your details need updating for our records.
This will ensure your subscription isn’t interrupted and that we are able to contact you should any issues arise.
Editing my Webbie Site
Making updates to your Webbie website is easy. And we’re not just saying that. We believe we have made it as easy as possible. It’s part of the reason we created Webbie. We found that so many small business owners couldn’t DIY their own website, and found it costly to maintain. If you can use the web, your emails, Facebook and Instagram and general online forms, then you’ll be able to edit your website. If you’ve never touched a computer or mobile phone, than yes, you may struggle.
On the main Support page (above), you will see 4 support boxes, with each website style named. Click on the website style you are using, and you will see a number of helpful guides for each section of your website. It includes guides on how to update images, how to update text and how to update links.
If you’re still struggling, contact our support team and we can personally help you out!
Need further assistance?
Get in touch with any questions or view our guides on our support page-

Additional Services
Custom logos, social media graphics, newsletter design and business cards.
Get a quote -

Leave us a message
If you have additional questions not answered in our FAQs, send us a message.
Message Us -

Site Support
If you're having any issues with your website, please contact us for immediate support.
View Support